Unit 07_ Editing UV & Adding Material in Substance Painter
- seobin051013
- 4월 6일
- 4분 분량

최종 수정일: 5월 17일
UV Mapping in 3D Maya
UV mapping is the process of projecting a 2D image onto the surface of a 3D model. Since 3D models are three-dimensional, their coordinates are fundamentally composed of X, Y, and Z, whereas texture images are two-dimensional and consist only of X and Y. Consequently, there are limitations to the computer automatically matching these coordinates, making it necessary to convert the 3D coordinates into a 2D (U, V) system.
Furthermore, before adding materials and colors to a creature that has completed the re-topology process, the UV mapping process must be completed. To apply textures and the visual properties of materials (such as softness, hardness, or the texture of tough leather) to the surface in a more detailed manner—especially in areas that are not easily visible (such as the armpits or the nape of the neck)—each object must be unfolded into a flat plane, much like drawing the net of a cube.

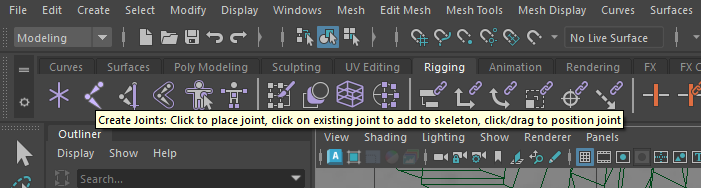
There are two main methods for generating UV: automatic and manual. These functions can be accessed from the “Create” menu at the top of the UV Editor window.
The automatic method automatically divides the UV based on the object’s normal directions and performs the unfold, making it suitable for unfolding UV on angular objects such as robots or buildings. On the other hand, there are several manual methods, including Camera-based, Normal-based, and Cylindrical.


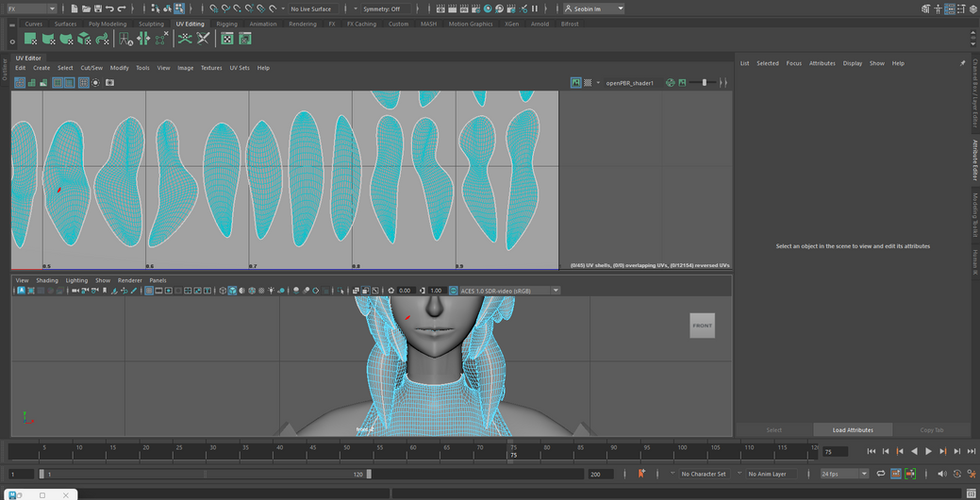
Of these, the methods I used most frequently were the camera-based and normal-based UV generation methods. By switching the camera view from Perspective to Front view, I was able to easily divide the UV for the face, the auditory organs on the head, the hands, and the torso, and convert them into flat planes. I could then conveniently unwrap the UV by selecting and cutting along the outermost edges of the UV, which were generated exactly as they appeared when viewed from the front. For the hands, I adjusted the perspective view to a top-down angle, edited them using the camera-based UV generation method, and then cut them along the little finger to convert them into flat surfaces.
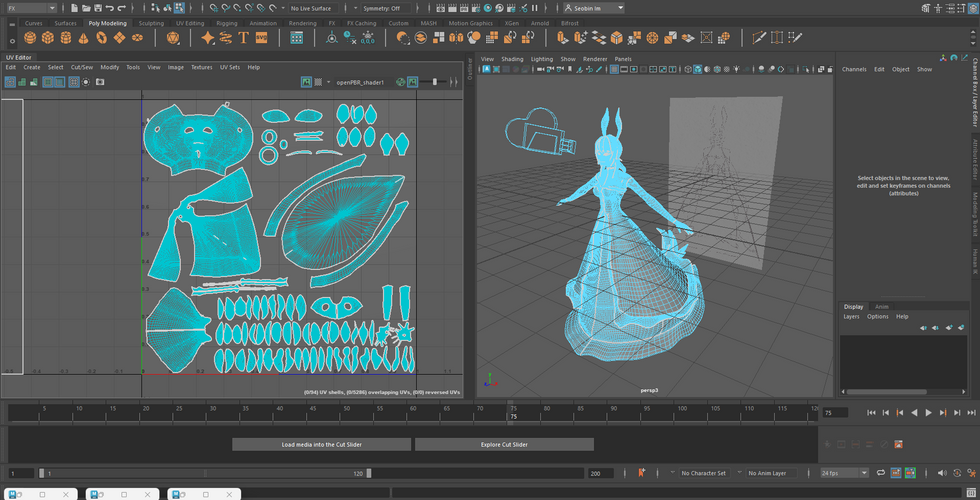
I have used the method of generating UV based on normal and then editing them for the character’s clothing parts, hair, and the poison sacs located on the lower body. For the hair, we generated UV by cutting a single piece in half and unfolding it to allow for detailed editing in Substance Painter, even for areas obscured by the nape of the neck or other parts. The frills along the edges of the dress worn by the creature had the most complex shape. We first created them using the normal-based method, then divided them into two main parts—those visible from the front and those that are not—and unfolded them using the Unfold function.

Using this method, I separated all the parts—including the hair, face, whites of the eyes and pupils, eyelashes, hands, arms, torso, lower body, lower body fins, venom sac, dress, dress frills, and the clothing underneath the dress—each of which has different colors and materials, and organized them by UV mapping. Next, to edit these in Substance Painter, select all objects, choose “Export Selection” from the File menu at the top, and save them as an FBX file. At this point, the UV mapping process can be considered complete.
Adding Colors and Material to Objects in Substance Painter

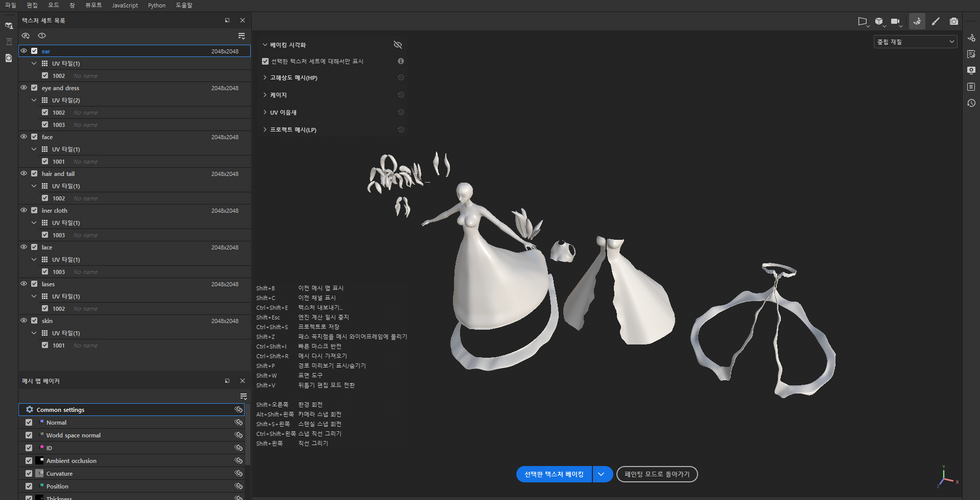
After extracting the UVs from Maya and completing the editing process in Substance Painter, I set the normal map format to DirectX for use in Unreal Engine and set the resolution to 2048 x 2048, taking my computer’s specifications into account.

Since the rendering results needed to be generated through both Maya and Unreal, I configured the Substance file format as shown in the image above and began the shading process in earnest. First, I painted the base colors of the UV.
Then, to differentiate the textures of the semi-transparent skin of the sea creature from the transparent hair, gills, and sensory organs, I added a Fill Layer, changed the blend mode to Multiply, and adjusted the Opacity, Metallic, and Roughness values.
For the creature’s skin, I depicted the texture as opaque and matte to capture a middle ground between the smooth skin of a sea snail and the slightly rough texture of human skin. At this point, I set the Metallic and Roughness values to 0.6 and 1, respectively.

I separated all the hair parts and laid them out to make the work a little easier. This is because, initially, whenever I painted the hair after extracting UV in Maya, the brush would affect areas that overlapped with other parts regardless of the specific area I wanted to paint, which slowed down my workflow. Through this experience, I learned that when objects with different materials or colors have overlapping surfaces, I should separate them before extracting UV.


After setting all of the materials of the objects, I should press the icon which is seems like the Croissant and called as 'bake'. The “Bake” function converts UV maps created in Substance into 2D images, such as PNG or JPEG files. This function is also used at the very beginning, before applying a base color to an object, to check where normal overlap.


댓글